Creating Your Vision

To begin your journey of creating a treasure map, it is essential to establish a clear vision of what you hope to achieve. Visualize the ultimate goal of the map and consider the emotions and excitement you want it to evoke in those who embark on the adventure. By defining your vision from the outset, you can effectively guide the creative process and ensure that every element of the map aligns with your overarching theme and objectives.
Take time to brainstorm ideas and sketch out rough drafts until you have a solid concept in mind that encapsulates the spirit of your treasure hunt. Consider the audience for whom you are designing the map and tailor your vision to cater to their interests and preferences. Remember that a well-defined vision serves as the foundation for a successful treasure map that captivates and engages participants from the very first clue to the final discovery.
• Begin by establishing a clear vision of what you hope to achieve
• Visualize the ultimate goal of the map and consider the emotions and excitement it should evoke
• Define your vision from the outset to guide the creative process effectively
• Ensure every element of the map aligns with your theme and objectives
Take time to brainstorm ideas and sketch out rough drafts until you have a solid concept in mind that encapsulates the spirit of your treasure hunt. Consider the audience for whom you are designing the map and tailor your vision to cater to their interests and preferences. Remember that a well-defined vision serves as the foundation for a successful treasure map that captivates and engages participants from start to finish.
Selecting a Theme
When embarking on the exciting journey of creating a treasure map, one of the crucial initial steps is choosing a theme that will guide the design and essence of your map. Whether you opt for a classic pirate theme complete with skulls and crossbones or a mystical ancient artifact quest, selecting a theme sets the tone for the entire treasure hunting experience. The theme you choose should not only resonate with you but also appeal to the audience or participants who will be deciphering your map.
Consider the elements of adventure, mystery, and intrigue that you want to convey through your treasure map theme. Let your creativity flow as you envision different possibilities that align with your chosen theme, ensuring that it will capture the imagination and curiosity of those who will be unraveling the secrets concealed within the map. By carefully selecting a theme that excites both you and the future treasure hunters, you lay a solid foundation for a captivating and memorable exploration of hidden treasures waiting to be discovered.
• When choosing a theme for your treasure map, consider what elements of adventure, mystery, and intrigue you want to convey
• Let your creativity flow as you envision different possibilities that align with your chosen theme
• Ensure that the theme resonates with both yourself and the participants who will be deciphering the map
• Selecting a theme sets the tone for the entire treasure hunting experience and captures the imagination of those involved
Gathering Materials
Once you have sketched out the basic layout of your treasure map and decided on the clues and landmarks to include, it is time to gather the materials needed for the physical creation of the map. There are various supplies you will require to bring your vision to life, such as paper or parchment for the map itself, ink or paint for detailing, and perhaps even some tea bags for aging effects. Consider adding a feather quill or a calligraphy pen for a more authentic touch to your map.
In addition to the basic materials, you may also want to think about incorporating elements like glitter for a touch of magic, sand for texture on the beach areas of your map, or even small trinkets like fake jewels or coins to add a sense of wealth and mystery. Remember, the materials you choose can greatly enhance the overall look and feel of your treasure map, so don’t be afraid to get creative and experiment with different options to bring your masterpiece to life.
• Paper or parchment for the map itself
• Ink or paint for detailing
• Tea bags for aging effects
• Feather quill or calligraphy pen for authenticity
• Glitter for a touch of magic
• Sand for texture on beach areas
• Small trinkets like fake jewels or coins
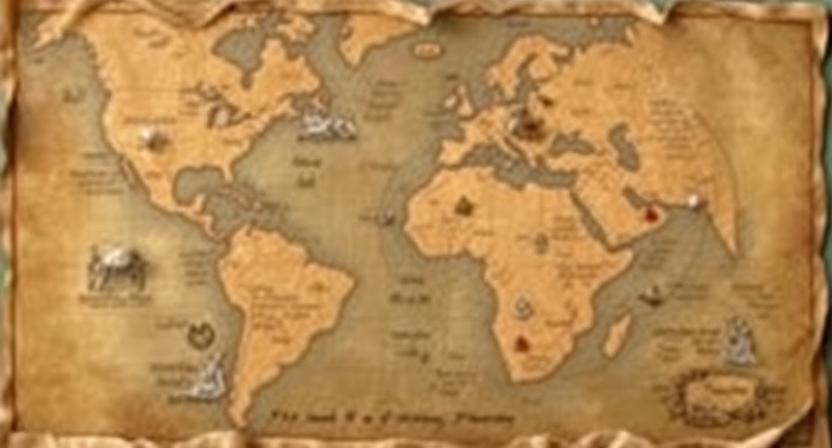
Choosing a Location
Once you have determined the theme of your treasure map and gathered all the necessary materials, the next step is to choose a suitable location for your adventure. The location you select should align with the theme of the map and offer opportunities for creativity and fun. Consider outdoor settings such as parks, forests, or beaches for a more adventurous feel, or indoor locations like your home or a local museum for a unique twist.
When choosing a location, think about accessibility for your audience and the level of difficulty you want to incorporate into the treasure hunt. Ensure that the location is safe and allows for easy navigation while still providing a sense of excitement and challenge. Remember to also consider any specific landmarks or features of the location that you can incorporate into your treasure map to make it more engaging and realistic.
• Outdoor settings such as parks, forests, or beaches offer a more adventurous feel
• Indoor locations like your home or a local museum provide a unique twist to the treasure hunt
• Consider accessibility for your audience when choosing a location
• Think about the level of difficulty you want to incorporate into the treasure hunt
• Ensure that the location is safe and allows for easy navigation
• Incorporate specific landmarks or features of the location into your treasure map
Mapping Out Your Route
Once you have selected your theme and gathered all the necessary materials, the next step in creating a captivating treasure map is mapping out your route. This is a critical stage where you determine the course that your treasure hunters will follow to reach their ultimate goal. Consider the landscape of your chosen location, the distance between landmarks, and the overall flow of the journey as you plot out the route on your map.
As you map out the route, think about incorporating twists and turns to add an element of challenge and excitement for the treasure hunters. By strategically planning the path they must follow, you can create a sense of anticipation and discovery throughout the adventure. Ensure that each step along the route is clear and concise on the map, guiding the seekers closer to the final destination with each landmark they uncover.
• Consider the landscape and terrain of the location
• Determine the distance between landmarks
• Plan out twists and turns for added challenge
• Create a sense of anticipation and discovery
• Ensure each step along the route is clear and concise
Adding Landmarks

When adding landmarks to your treasure map, consider incorporating distinctive features that are easily recognizable and memorable. These points of interest can serve as important navigational tools for the map reader, guiding them along the path to the hidden treasure. Landmarks can range from natural elements such as trees or rock formations to man-made structures like buildings or statues, adding depth and character to the map’s design.
Selecting landmarks strategically can enhance the overall storytelling aspect of your treasure map, creating a sense of adventure and mystery for those embarking on the journey. By including landmarks that hold significance or spark curiosity, you can evoke a sense of intrigue and excitement in the map reader, enticing them to unravel the clues and uncover the hidden treasure waiting to be found.
• When choosing landmarks for your treasure map, consider the following:
– Opt for distinct features that stand out and are easily identifiable
– Mix natural elements with man-made structures to add variety
– Select landmarks that have a story or historical significance to engage readers
• Landmarks can help create a sense of direction and progression in the treasure hunt:
– Use landmarks as checkpoints along the route to guide map readers
– Incorporate landmarks strategically to lead players closer to the treasure location
– Make sure each landmark serves a purpose in advancing the narrative of the map
Including Clues
When incorporating clues into your treasure map, consider the level of difficulty you want to present to the participants. Clues should be challenging enough to engage the participants in solving the map but not so difficult that they become frustrated. Think about the theme of your treasure hunt and ensure that the clues align with the overall concept.
Additionally, make sure that the clues are relevant to the landmarks and locations marked on the map. The clues should guide the participants from one point to the next in a logical and cohesive manner. By strategically placing hints and clues throughout the map, you can create an immersive and exciting experience for those embarking on the treasure hunt.
• Consider the difficulty level of clues
• Clues should be engaging but not frustrating
• Ensure clues align with the theme of the treasure hunt
• Make sure clues are relevant to landmarks and locations on the map
• Guide participants from one point to the next logically
• Strategically place hints and clues for an immersive experience
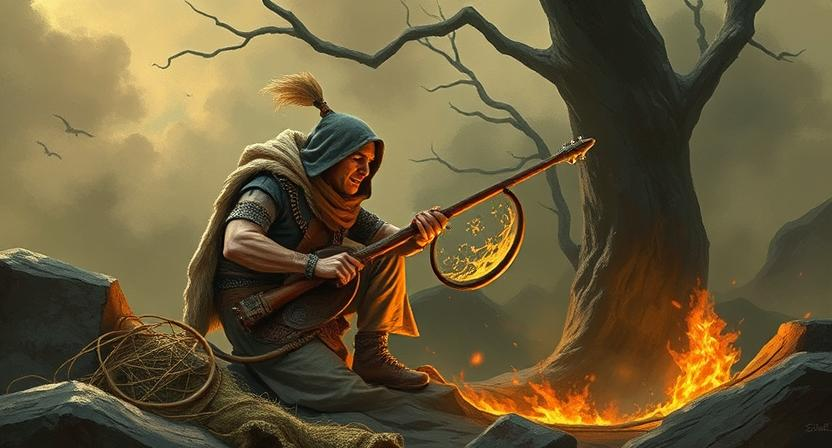
Incorporating Riddles
Riddles are an essential element when creating a treasure map. They add an interactive and engaging aspect to the adventure, challenging the treasure hunters to solve puzzles along the way. By incorporating riddles into your map, you can make the journey more exciting and rewarding for those seeking the hidden treasure.
When crafting your riddles, consider the difficulty level to cater to your audience. You want them to be challenging enough to be satisfying to solve, but not so difficult that they frustrate the participants. Make sure the riddles are cleverly woven into the map’s clues, leading the seekers closer to the final destination with each solved puzzle.
• Riddles enhance the overall experience of a treasure hunt by adding an element of challenge and fun.
• Consider the age group and skill level of your audience when creating riddles for your map.
• Cleverly weave the riddles into the clues on the map to guide participants towards their goal.
• Balance the difficulty level of the riddles to ensure they are challenging yet solvable.
Deciding on a Final Destination
When it comes to crafting a treasure map, one of the crucial steps is deciding on a final destination. This destination serves as the ultimate goal for the treasure hunters and provides a sense of purpose and direction to the entire adventure. The final destination should be strategic, captivating, and rewarding, enticing the seekers to navigate through the map with determination and excitement.
Before settling on a final destination, consider factors such as accessibility, relevance to the theme or story behind the treasure hunt, and the level of challenge it presents to the participants. The chosen destination should be significant enough to make the journey worthwhile and memorable for those embarking on the treasure hunt. Selecting a final destination that aligns with the overall vision of the map will enhance the experience and ensure that the treasure hunters feel a sense of fulfillment upon reaching their goal.
• Accessibility: Ensure that the final destination is easily reachable for all participants
• Relevance to Theme: Make sure that the destination ties in with the theme or story of the treasure hunt
• Level of Challenge: Consider how challenging it will be for participants to reach the final destination
• Significance: Choose a destination that will make the journey memorable and rewarding
• Alignment with Vision: Select a final destination that aligns with the overall vision of the treasure map
Adding Hidden Compartments
When adding hidden compartments to your treasure map, consider the element of surprise and delight it can bring to the overall experience. Hidden compartments can create a sense of mystery and intrigue, encouraging the map seeker to carefully explore every inch of the map for hidden secrets and treasures. By incorporating hidden compartments, you are not only enhancing the visual appeal of the map but also adding an interactive element that engages the treasure hunter in a more immersive way.
To add hidden compartments to your treasure map, you can use a variety of techniques such as creating foldable flaps, sliding panels, or invisible ink that reveals hidden messages under certain conditions. These compartments can be cleverly integrated into the design of the map, blending seamlessly with the overall aesthetic while still providing a fun and engaging challenge for those seeking the treasure. Remember to consider the size and placement of the compartments to ensure they are not too obvious but still accessible to those who are observant and curious.
• Creating foldable flaps can add a tactile element to the treasure map
• Sliding panels can reveal hidden compartments in a unique and interactive way
• Using invisible ink adds an element of mystery and surprise for the treasure hunter
• Integrating compartments seamlessly into the design enhances the overall aesthetic of the map
Including X Marks the Spot

One iconic feature of a treasure map is marking with an ‘X’ the spot where the hidden treasure lies. This simple yet powerful symbol adds an element of excitement and mystery to the map, drawing in the reader and igniting their sense of adventure. Placing the ‘X’ strategically on the map requires careful consideration of the surrounding landmarks and clues to ensure that the final destination is both challenging to find yet ultimately rewarding.
When incorporating the ‘X’ marks the spot on your treasure map, think about how you can cleverly integrate it into the overall design without giving away the location too easily. The placement of the ‘X’ should entice the reader to follow the map’s clues and landmarks, leading them on a thrilling journey towards the hidden treasure. By carefully selecting the location for the ‘X’ marks the spot, you can enhance the sense of anticipation and make the discovery of the treasure even more satisfying.
• When placing the ‘X’ on your treasure map, consider the following:
– Use surrounding landmarks to guide the reader towards the hidden treasure
– Avoid placing the ‘X’ in an obvious or easily accessible location
– Create a sense of mystery and excitement by strategically placing the ‘X’
• The ‘X’ marks the spot can be used as a focal point of your treasure map design:
– Make it visually appealing to draw attention
– Incorporate elements that hint at adventure and discovery around the ‘X’
– Use creative typography or embellishments to make the ‘X’ stand out
• Remember that the journey is just as important as finding the treasure:
– Design a map with challenging clues and obstacles along the way
– Build anticipation by leading readers through a series of twists and turns before reaching their final destination
Decorating with Pirate Symbols
When it comes to adding a touch of authenticity to your treasure map, incorporating pirate symbols can really elevate the overall aesthetic. Symbols such as skulls, crossbones, ships, and compass roses can not only make your map look more ominous and intriguing but also contribute to the adventurous theme you’re aiming for. Don’t be afraid to get creative with how you integrate these symbols into your design, whether it’s using them to mark key locations or as decorative elements scattered throughout the map.
Pirate symbols can serve as visual cues for the treasure hunters, guiding them along the path to the final destination. By strategically placing these symbols in strategic locations on the map, you can enhance the immersive experience and make the journey more engaging for those deciphering the clues. Remember to balance the use of symbols with other elements on the map to ensure they complement each other harmoniously and contribute to the overall mystery and allure of the hunt.
• Incorporate skulls, crossbones, ships, and compass roses for authenticity
• Get creative with how you integrate symbols into your design
• Use symbols to mark key locations or as decorative elements scattered throughout the map
Pirate symbols can serve as visual cues for treasure hunters:
• Guide them along the path to the final destination
• Enhance the immersive experience and make the journey engaging
• Balance use of symbols with other elements on the map for harmony
Using Different Textures
Incorporating various textures into your treasure map can add depth and interest to your creation. Consider using different types of paper, such as parchment or thick cardstock, to create a tactile experience for whoever interacts with your map. Mixing smooth and rough textures can also help highlight certain areas or details on the map.
Additionally, think about incorporating elements like fabric, sand, or even small trinkets to enhance the overall feel of the map. These textures can evoke a sense of adventure and mystery, making the experience of following the map even more enjoyable. Experimenting with different textures can truly elevate your treasure map to a work of art that captivates the imagination of those who embark on the journey to uncover its secrets.
– Using different types of paper, such as parchment or thick cardstock, can create a tactile experience
– Mixing smooth and rough textures can help highlight certain areas or details on the map
– Incorporating elements like fabric, sand, or small trinkets can enhance the overall feel of the map
– Experimenting with different textures can elevate your treasure map to a work of art that captivates imagination
Adding Aging Effects
To give your treasure map an authentic and aged look, consider using different techniques to enhance its appearance. You can crumple the paper slightly to create creases and wrinkles, simulating the wear and tear of a map that has been passed down through generations. Additionally, you can lightly singe the edges of the map with a candle to give it a weathered and burnt effect, adding a touch of mystery and intrigue.
Another way to achieve an aging effect is by staining the map with tea or coffee. This will give the paper a yellowed and vintage appearance, making it look as though it has been exposed to the elements for years. Experiment with different concentrations of the liquid and drying times to achieve the desired level of aging and authenticity for your treasure map.
• Crumple the paper slightly to create creases and wrinkles
• Lightly singe the edges of the map with a candle for a weathered effect
• Stain the map with tea or coffee to give it a yellowed appearance
• Experiment with different concentrations of liquid and drying times
Sealing the Map
Once you have meticulously crafted your treasure map, the final step is to seal it for both authenticity and preservation. Sealing the map not only adds a layer of protection against wear and tear but also gives it an official and timeless appearance. This crucial step ensures that your hard work and creativity will be admired for years to come.
To seal your map effectively, consider using a clear sealant or adhesive that is waterproof and durable. Carefully apply the sealant across the entire surface of the map using a small brush or applicator to prevent smudging or smearing any details. Allow sufficient time for the sealant to dry completely before handling the map to avoid any unwanted smudges or marks. By sealing your treasure map, you are not only safeguarding its intricate design but also enhancing its overall presentation and allure.
• Once you have meticulously crafted your treasure map, the final step is to seal it for both authenticity and preservation.
• Sealing the map not only adds a layer of protection against wear and tear but also gives it an official and timeless appearance.
• This crucial step ensures that your hard work and creativity will be admired for years to come.
• To seal your map effectively, consider using a clear sealant or adhesive that is waterproof and durable.
• Carefully apply the sealant across the entire surface of the map using a small brush or applicator to prevent smudging or smearing any details.
• Allow sufficient time for the sealant to dry completely before handling the map to avoid any unwanted smudges or marks.
• By sealing your treasure map, you are not only safeguarding its intricate design but also enhancing its overall presentation and allure.
Creating a Legend
Creating a legend for your treasure map is an essential step in adding mystique and intrigue to your adventure. Legends provide a backstory to the hidden treasure, adding depth and excitement for those embarking on the journey. Whether it’s a tale of a lost pirate crew or a buried treasure guarded by mythical creatures, crafting a compelling legend can captivate the imagination of those following your map.
To create a captivating legend, consider incorporating elements of mystery, danger, or folklore that align with the theme of your treasure map. Think about the origins of the treasure, the obstacles that must be overcome to reach it, and the significance of the final destination. A well-crafted legend can immerse participants in the adventure, sparking their curiosity and driving their determination to unravel the mysteries hidden within the map.
• Legends provide a backstory to the hidden treasure, adding depth and excitement for adventurers
• Crafting a compelling legend can captivate the imagination of those following the map
• Incorporate elements of mystery, danger, or folklore that align with the theme of your treasure map
• Consider the origins of the treasure, obstacles to overcome, and significance of the final destination in crafting your legend
Testing the Map
Before finalizing your treasure map, it is crucial to test its functionality and clarity. One effective way to test the map is by inviting a friend or family member to follow it and provide feedback on any confusing or misleading elements. Observing someone else navigate the map can offer valuable insights into areas that may need improvement.
Additionally, consider testing the map in different lighting conditions to ensure that all details are visible. By examining the map under various lighting settings, you can guarantee that it remains accessible and legible regardless of the environment in which it is used. Testing the map thoroughly will help you refine its design and enhance the overall experience for those embarking on the treasure hunt.
• Invite a friend or family member to follow the map and provide feedback
• Observe how they navigate the map for any confusing elements
• Test the map in different lighting conditions to ensure visibility of all details
• Guarantee that the map remains accessible and legible in any environment
• Thorough testing will help refine the design and enhance the overall experience
Making Copies
With your treasure map completed, it’s time to consider making copies. Creating duplicates ensures that your original masterpiece remains safe while allowing you to share your adventure with others. Before you start reproducing your map, make sure that all details are clear and easily understandable. Each copy should retain the essence of the original map, capturing the excitement and mystery you’ve embedded within it.
Consider the quality of materials you will use for making copies. Opt for paper that is durable and can withstand the test of time. Remember that each copy should be as detailed as the original, so pay attention to every line and symbol as you replicate your treasure map. Once your copies are complete, you can share them with friends and family, inviting them to share in the thrill of deciphering your carefully crafted clues and discovering the hidden treasure.
• Use circle bullet style
• Language: Default
• Tone: default
– Consider the quality of materials for making copies
– Opt for durable paper that can withstand time
– Pay attention to every detail while replicating the map
– Share copies with friends and family to invite them into the adventure
Sharing Your Treasure Map
One of the most exciting parts of creating a treasure map is sharing it with others. Sharing your masterpiece allows you to showcase your creativity and storytelling skills. It’s a moment to see how others interpret your clues and landmarks as they navigate through the map you’ve carefully crafted.
When sharing your treasure map, consider the level of difficulty and complexity based on your audience. Whether it’s friends, family, or a group of adventurous enthusiasts, tailor the map to cater to their interest and familiarity with solving puzzles. Observing their reactions and hearing their feedback can be rewarding and insightful as you continue to hone your skills in map-making.
• When sharing your treasure map, consider the age group and interests of your audience
• Tailor the difficulty level of the map to match the skills and experience of those solving it
• Pay attention to how others interpret your clues and landmarks as they navigate through the map
Seeking Feedback
Once you have created your treasure map, seeking feedback from others can be a valuable step in refining your design. Show your map to a few friends, family members, or colleagues and ask for their honest opinions. Pay attention to their feedback and consider any suggestions they may have for improving the clarity or creativity of your map.
Feedback can provide fresh perspectives and highlight any areas that may need tweaking. It’s important to be open to constructive criticism and use it as an opportunity to enhance the overall quality of your treasure map. By seeking feedback, you can ensure that your final product is engaging, well-crafted, and enjoyable for others to decipher.
Seeking feedback is an essential part of the design process, as it allows you to gather different viewpoints and improve your work. Here are some key points to keep in mind when seeking feedback on your treasure map:
• Choose a diverse group of people to provide feedback, as they may offer unique insights.
• Encourage honest opinions and constructive criticism to help you identify areas for improvement.
• Take note of common themes or suggestions that arise from multiple sources, as these may indicate areas that need attention.
• Be open-minded and receptive to feedback, even if it challenges your original ideas.
• Use feedback as a guide for making revisions and enhancements to your treasure map.
By actively seeking feedback and incorporating valuable input into your design process, you can create a more polished and well-rounded treasure map that resonates with others. Remember that constructive criticism is not meant to tear down your work but rather to help you refine it and make it even better.